Contents
Cleaning your Mechanical Keyboards is very important because if you don’t clean them, it might result in sticky keys later on which will affect your typing experience. Also, regularly cleaning improves the lifespan of your keyboard to a big extent. Although the way of cleaning of mechanical keyboards is almost the same for any type, we are here to educate you today on cleaning a Razer Keyboard.
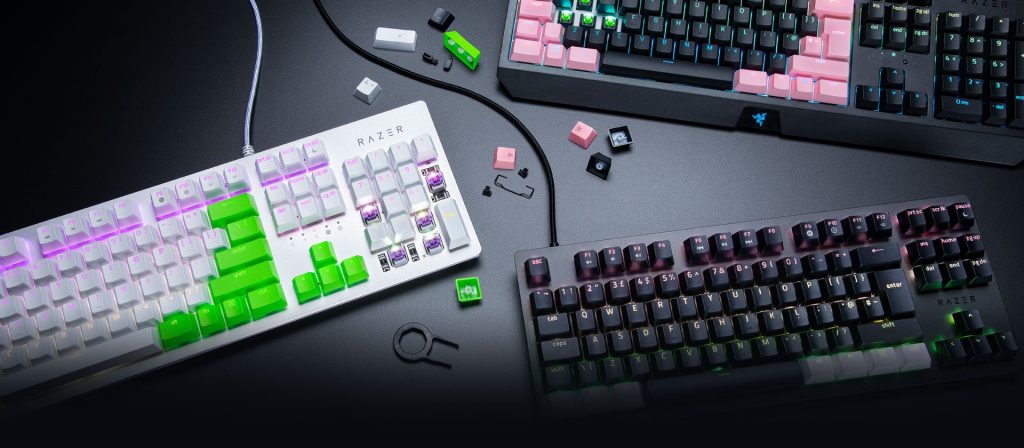
How to Clean the Razer Keyboard?
The best way to clean a Razer keyboard would involve a few specific steps. To begin with, you should remove the keycaps and clean them with a cleaning solution. Use a brush to remove the dust and dirt on the keyboard. You can use a lens or display cleaner to clean the underside of the keyboard and the other areas except around the keys. You can even use canned or compressed air to clean the debris out from the keyboard.
What Are Razer keyboards?
Razer Keyboards, as the name itself should indicate, are the mechanical keyboards manufactured by Razer. In fact, Razer is a brand associated with high-end gaming keyboards.
If you are a gamer, a Razer keyboard is one of the wisest and practical investments you would make. What makes them stand out from the other competing brands with respect to the best keyboards lies in the fact that they are specifically focused on providing a perfect gaming experience.
The Razer keyboards come with a colorful design and other similar features that work the best with the gamer’s need. Of course, you would find them missing in some of the best features that a work-centric keyboard may have. In essence, if you are someone who wants to explore the best features on a gaming keyboard, a Razer keyboard should be something you would find rather an enhanced experience ever.
The Razer Switches – The Backbone of Razer Keyboards
Razer Switches are keyboard switches specifically designed for use with Razer keyboards. The in-house key switches manufactured by the firm are used specifically for their own range of keyboards. In fact, before 2014, Razer keyboards made use of the Cherry MX keyboard switches.
Razer claims that the prime reason for moving ahead to manufacture their own range of keyboard switches was because of the issues faced by Cherry in meeting the demand for the Cherry MX key switches for the keyboards manufactured by Razer. In fact, even today, Razer key switches are considered to be Cherry MX clones, even when they have their own differences.
Kailh and Greentech manufacture the Razer keyboard switches. While Razer was unwilling to divulge the name of the keyboard switch manufacturers till recently, the names were recently made public in some form or the other.
Razer has two of the most widely used key switches: Green and Orange (There is a third version of Yellow switch as well). The Razer Green switches are found to be almost equivalent to Cherry MX Blue but come with a little higher actuation point and shorter reset point. This can go a long way in reducing the lag on your finger to a better extent.
The Razer Orange is quite close to Cherry MX Brown and again, comes with a slight variation in the actuation point and reset distance.
How to Clean a Razer Keyboard?
Razer keyboards have been one of the most widely used keyboards for gaming and even for work-based requirements. However, those of you who have used a Razer keyboard would have already noticed that it requires a lot of cleaning.
The prime reason why a Razer keyboard needs extensive cleaning lies in the fact that the gunk, hairs, dust, and other elements are showing up clearly because of the LED lights. The best way to clean your Razer keyboard would be to use rubbing alcohol, cotton swabs, and canned air for the best possible experience.
Things You Need to Clean Your Razer Keyboard
Before cleaning your Razer keyboard, you would need the following things ready:
- Rubbing alcohol: Make sure you are sourcing the rubbing alcohol with 70 percent concentration.
- A plastic container or bowl.
- Cotton balls.
- Cotton swabs.
Follow the Keyboard Cleaning Methodology Here:
-
Prepare Your Keyboard for Cleaning
Make sure you have unplugged the keyboard from the PC. Most of the keyboards from Razer come with colorful lighting. Disconnecting the keyboard from your PC will ensure that you are not damaging the keyboard or its lighting.
Shut off all the lights and settings before you proceed with the cleaning of your keyboard. Take a picture of your keyboard before it is removed or disassembled for cleaning. The image will help you put everything back in place after the cleaning is done.
-
Remove the Keycaps
The next step would be to remove the keycaps. Remove the keycaps one by one. Make sure you are applying an upward force to remove the keycaps. Never ever bend the keycaps when removing as it may damage the connectors on the keys.
Larger keys such as the Space bar, Enter key, and Shift key come with hinges connected to the keyboard. They can have white clips below the keys. Make sure you have removed the keys with proper care. You may need to use the keycap puller for the purpose.
-
Clean Keycaps
Once the keycaps have been removed, you need to clean them up. Collect all the keycaps in a plastic container. You can then use rubbing alcohol or isopropyl alcohol with a lint-free cloth to clean the keycaps one by one.

Make sure you have removed every possible sign of dirt and dust from the keycaps. Take care to remove all the stains. You can even make use of the cotton ball and a cotton swab to clean up the keycaps one by one. Yet another excellent option would be to keep the keycaps in a bowl filled with hot water for a good 30 minutes. This can be helpful in removing stubborn stains more efficiently.
-
Clean the Keyboard
Cleaning the rest of the keyboard would involve the use of canned air. You can either use canned air or even make use of the laptop geyser for cleaning up the keyboard thoroughly. Use a shot burst of air all along each of the rows on the keyboard.
Do not wonder if you do not find any of the dirt coming out of the keyboard. The rubbing alcohol you just sprayed will take care of the dirt, dust, and gunk. You can use the cotton swabs with rubbing alcohol to clean up the grooves. Just ensure that you are taking care not to damage the lights on the keyboard. Remove all the gunk surrounding the keys.
The remaining part of the keyboard can be cleaned using the wipe or cotton ball infused with rubbing alcohol. Take care not to use water when cleaning the keyboard as it can damage the lights and other parts of the keyboard.
-
Attach the Keycaps Back in Place
The next step would be to reattach the keycaps on the keyboard. However, do ensure that the keyboard has dried completely before you reassemble it back in place. Check your keycaps as well to find if they are dry before you can replace them back in its place.
You can make use of the image you had taken before taking the keyboard off or use a user manual to reattach the keyboard back in place. Once you have reattached all the keycaps, plug it on and turn on the LED lights back on. The light will give you an idea of whether you have fixed all the keys in the right place and in the right manner.
A Few Additional Ways to Clean Razer Keyboards
There are several ways you can use to clean a Razer keyboard. Some of the best options you can utilize for cleaning a Razer keyboard would include checking out the following options –
-
A Complete Cleaning
The complete or thorough cleaning involves dismantling the keyboard and cleaning up the interiors thoroughly. Do note, however, that you should not undertake this method if you are a novice and do not have the requisite technical expertise.
You may end up damaging and breaking the keyboard if you are not careful enough. Make sure you have the requisite skills in dismantling the keyboard and cleaning it up.
-
Make use of Keyboard Cleaning Soft Glue
You may also use keyboard cleaning glue for efficient, effective cleaning of the Razer keyboards. The keyboard cleaning soft glue can be yet another excellent option to clean up the dust and dirt in the gap inside the crevices on your keyboard.
Applying it should be extremely simple. You just need to apply it in the areas where you find the dust or dirt and gently peel it off. The glue or gel peels off the gel with efficient and effective functionality.
-
Use Alcohol for Disinfection
Alcohol can be an excellent option for removing the bacteria and other microorganisms on your keyboard. In addition to cleaning up your keyboard, alcohol can be one of the excellent options to help you remove the bacteria and other organisms.
The Concluding Thoughts
Well, Razer Keyboards have always been one of the best choices for your needs in an enhanced and effective gaming experience ever. We would assume the tips shared here should ideally be helpful in letting you achieve the best cleaning experience for your needs.
Check out those tips to arrive at the perfect options for your needs in getting access to a truly powerful cleaning regime ever. Stay tuned on Feedbeater.com for more Keyboard guides, and tips & tricks.