Contents
If you are new to Mechanical Keyboard, Read the Benefits of Mechanical Keyboard first to know what advantages it offers.
How to Change Mechanical Keyboard Switches?
Quick Answer:
You have to remove the keycaps using a keycap puller, and then remove the switches that you have to desolder, and then fit the new switch there, and solder again. And, at last, fix the keycap. Moreover, if your keyboard is hot-swappable, then both keycap and switches can be pulled out with a puller, and then fix the new one, and done.
Later in this article, we will explain this in more detail. Stay Tuned…
Mechanical Switches are the ones that make a mechanical keyboard more desirable than membrane keyboards because they come in many varieties and a good fit for different jobs. So, it becomes tough to choose the best one that suits your requirement. So, there are a few factors you should consider for the Switches when you plan to buy a Mechanical Keyboard. We have mentioned these factors in much easier and general language to make you understand it better.
- Durability: The durability of the switches of a mechanical keyboard is the first thing that you would want to notice while purchasing. However, you would need to invest a fair amount of money if you want it to last long.
- Functionality: The functionality of the keyboard counts as one of the major important factors when you want to purchase a mechanical. It’s features and the functionality it brings along with it is something that caters to your interests. Whether the switches are functional enough for the money, you are paying off or are just getting counted as the extras on the board.
- Responsiveness: The responsiveness of the mechanical keyboard you choose matters to a great extent. If you need to press every key hard and swift touches don’t work, then the keyboard is undoubtedly less responsive.
- Design: It is solely the style and design of the mechanical keyboards that ends up attracting the attention of the users. The backlit keyboards and the light coming from beneath it make the keyboard look absolutely fine and stylish.
- Versatility: Lastly, it all sums down to the versatility of the mechanical keyboard that makes all the difference. The versatile design, exquisite look, and excellent functionality – every aspect of it is considered for judging its versatility.
Whether it is a professional keyboard that you are looking for or a gaming one, the smoothness and the fluidity, and the clattering sound make all the difference.
What are Mechanical Switches?
We have already mentioned in various articles of ours about Mechanical Switches, but again we give a little introduction of these here too so that you understand things on a single page.
Mechanical switches are nothing like the ordinary keyboard switches. Underneath every key, there is a separate mechanism that works whenever you press it to register the data on the screen. However, there are quite a several elements that matter in the structural formation and application of the mechanical switches. The parts of a mechanical switch are as follows:
- Stem: The particular part of the mechanical keyboard can determine the travel distance and the actual application of the switch of the keyboard. If you want to get the feel of the ideal keystroke, you must consider installing a great stem.
- Upper Housing: Covering the stem is the upper housing, which is ideally designed to protect the stem of the particular switch. It doesn’t only keep the stem covered but also increases the durability.
- Coil Spring: It entirely depends on the quality of the coil spring regarding how much pressure you need to apply to register the data on the screen. It comes with a resistance that can determine the press of the switch and then going back to its original position again.
- Base Housing: After the coil spring, you need to consider the base housing of the mechanical switch. It attaches the switch with the help of the clip to the PCB.
- Crosspoint Contact: Though the small metal element is comparatively small, the crosspoint contact can supply electricity to the switch. Whenever you press the key, the particular mechanism closes the switch contact and registers the keypress.
Types of Mechanical Switches
There are a variety of mechanical switches to choose from that caters to your need with their versatile features. They are:
- Linear Switches: If you look for the simplest operations with a mechanical keyboard, the Linear Switches will come to great use. If you are not too fond of the keystroke noise, then linear switches will be the ideal choice.
- Tactile Switches: If you are someone who has quite a fancy choice, the tactile switches can definitely meet your expectations. Whenever you press a tactile key, you would end up getting a noticeable bump that stands out to be one of the most prime choices for the users.
- Clicky Switches: As the name indicates, the clicky switches are the ones that make a clicking sound when you press on them. Not only does it have the clicking sound, but it also makes a bump that makes all the difference.
Why Change the Mechanical Keyboard Switches?
Changing the switches on your Mechanical Keyboards can be due to many reasons. Whether you want different switches for your keyboard or the switches are not working or any other reasons. For example, when I used to work from home, and I had a mechanical keyboard that had clicky switches. that was very noisy. So, I bought silent switches and replaced them, and my keyboard sound was minimized, and I worked from home without disturbing family members sleeping in the next room. So, reasons can be anything. The important thing is to know how to change Mechanical Keyboard switches as you need to know before doing it.
No matter what your reason is, you can get to know how to replace a key switch keyboard once you read this article completely.
How to Change Mechanical Keyboard Switches? {By Soldering/Desoldering}
If your Mechanical Keyboard is not a hot-swappable keyboard, then you have to go through desoldering and then resolder to change the switches.
You need to know how to open and have access to the PCB on the keyboard. You need to desolder the key switch from the keyboard circuit board. Once that done, you need to solder the new switch.
What do you need?
Apart from the keyboard, you would need a few things that would be needed for the process:
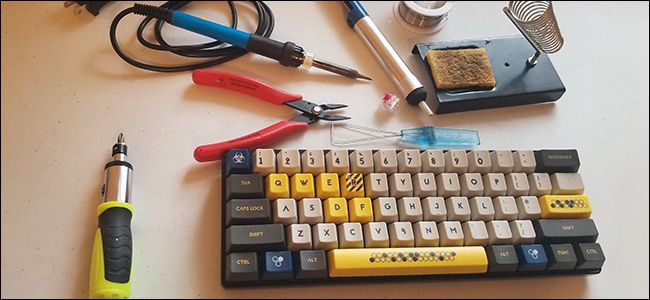
- A soldering gun and soldering accessories.
- Keycap puller.
- Compatible keyboard switch for replacement.
- A smaller screwdriver
- Smaller tweezers
- LED and wire cutters
Here is what you would do:
Step 1: Disassemble the keyboard case
Disconnect the keyboard from your PC and remove the outer case to access the PCB of your keyboard. In some of the keyboards, you may only need to remove the keycaps to access the PCB and do not need to remove the case. A complex keyboard such as a Razer keyboard may require you to use sophisticated tools and methods to remove the switch. So, basically, remove everything so that you can access to the PCB’s other side where you can see soldered circuitry.
Step 2: Make Preparation to Desolder
Make sure that when you remove the keycaps, keep them away from there because accidentally you may melt them using the soldering tool. Also, make sure that you have all the necessary tools with you. Plugin your soldering gun and place your PCB upside down for accessing the malfunctioning switch. You must know which switch you have to replace, and then only desolder them.
Step 3: Desolder the switch
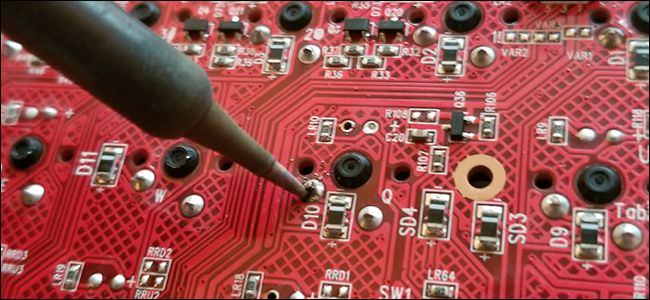
Press the heated tip of the soldering gun to the corresponding connection. Heat the old solder until it turns into liquid form. Make sure you do not touch any other part of the PCB with your gun to ensure that it isn’t damaged. As soon as the switch tips are liquefied, push it to dislodge the switch for the PCB. And, also use the de-soldering pump(Solder Sucker) to suck all the liquid solder before they cool down and become solid again.
Step 4: Remove the Switch
You should simply be able to pull off the switch. You should be able to remove it with the help of your fingers and a set of pliers. If the switch is not coming out easily, you can repeat the desoldering process to remove any of the remaining solder.
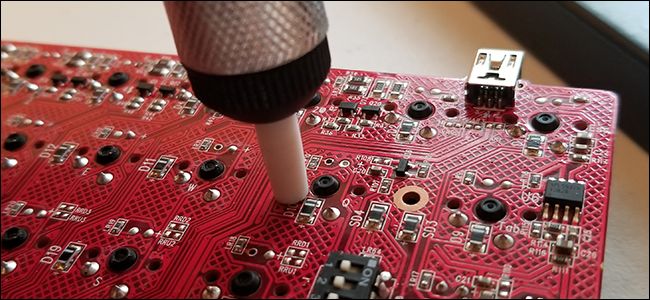
Step 5: Install the New Switch
Get hold of your new switch and check if the pins are intact. Place it firmly on your PCB and check if it snaps in properly. Once it is in place, check it with other switches and find if it is properly aligned. Once the switch is in place; you can now move on to solder it once.
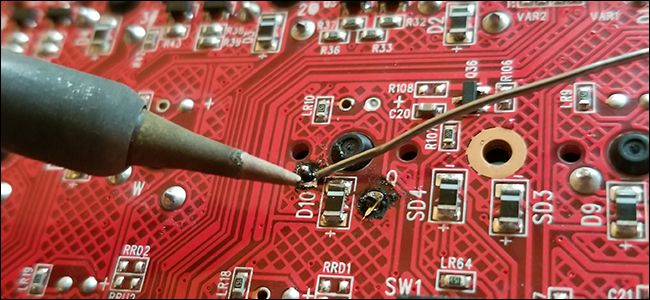
Step 6: Solder the New Switch
Heat up your soldering gun once again and solder the corresponding pins to close the electrical circuit. When soldering, take care not to let the solder to spill over onto the other non-conductive material adjacent to the keyboard.
Step 7: Test your switch
Before reassembling the case and other elements of the keyboard, make sure that the switch is working fine. Type in something or search for something on your word processor or any other application.
Once you are satisfied, you can simply connect everything up and get your keyboard back in shape.
The video here should provide you with a better understanding.
How to Change Mechanical Keyboard Switches? {Hot-Swappable Keyboards}
You already learned above that how to change Mechanical Keyboard switches. Now, again we are going to guide you the same but this time, you will learn how to replace the switches on hot-swappable keyboards. Don’t worry! It is much easier to do on these kinds of keyboards.
What is a Hot Swappable Keyboard?
Generally, in the Mechanical keyboards, switches are soldered to the PCB but in the Hot-swappable keyboards, the switches are not soldered. But, they are placed using hot-swappable sockets on the keyboard. That means, there is no soldering but there are sockets which is like plugging in and plugging out.
The benefit of having a hot-swappable keyboard is that switch replacement is much easier as you just have to remove with a normal switch puller tool, and then using your hands, just set the pins of the switch fit well to the socket, and as you feel the pins went inside the socket, just push a bit, and the switch will be installed. That’s it!
In short, you simply pull the switches out and push the new ones into the hot-swap sockets.
How to Change Hot-Swappable Mechanical keyboard Switches?
-
Gather the Switches You Want
Identify which switches on the Hot-swappable keyboard you want to replace. Then, buy them, and keep it with you. Make sure that you get the switches that are compatible with your Hot-swappable Keyboard.
-
Remove Keycaps
If you have a hot-swappable keyboard, you must have got a keycap puller with it. If not, you can buy one, and then use that to pull out keycaps first. This is the first step because to pull out switches, you have to first remove the upper covering. i.e. Keycaps.
You can do exactly as you see in this screenshot, where you have to set it like this and pull. You will hear a click sound that confirms that the keycap is detached. Now, just pull out.
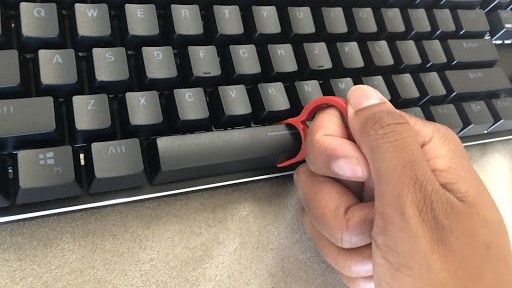
There are different types of keycap puller come but the basic way is to remove the keycap is same. Just the placement of the puller should be well, and then just pull out gently.
-
Remove Switches Using Switch Puller
Use a switch puller tool to remove switch from your hot-swappable keyboard. This is as easy as removing the keycaps. Just fit the tool well just you see in the screenshot below, and pull out.
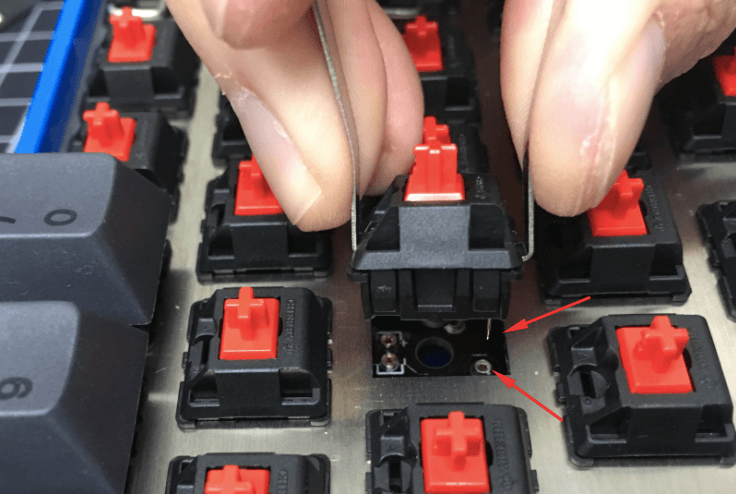
Do the same thing for all the switches that you want to replace.
-
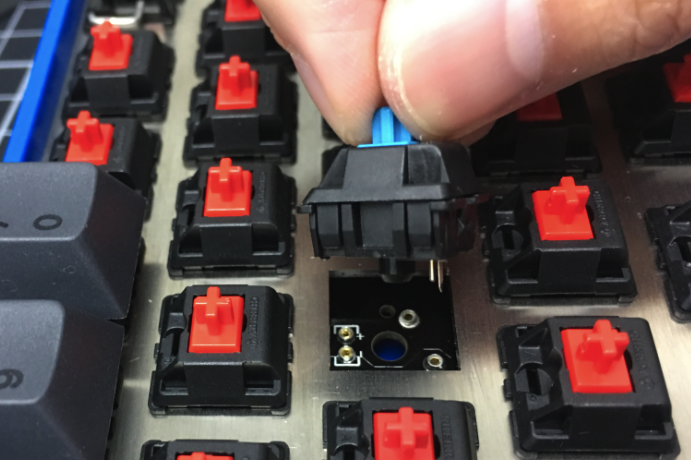
Insert New Switch
Now, since keycaps and switches are removed, it is time to install the new switches. Since it is a hot-swappable keyboard, you just have to take care of the pins of the switch that it pins well with the socket, and then press down. And, your switch will be inserted. Now, insert the keycap. That is it! Now, do the same for all the switches.
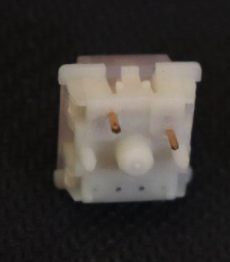
You can see the pins in the image below which needs to go in the holes on the socket, and then push down to insert the switch.
Now test out the switches if they are working well. So, this is the way, you can easily change the switches of hot-swappable mechanical keyboards.
Conclusion
Here you go! Now that you know how to change mechanical keyboard switches, it is time for you to get on with your keyboard. I Hope, doing that was relatively easy, and you can have an absolutely new keyboard done within a few minutes. Also, do not forget to give us a sneak peek of the customized designs you came up with.