If you have been using mechanical keyboards, you should be aware that the key switches do play a major role in how you work with the keyboard. That is exactly why you should focus on how to take care of the keyboard and how to take enough care of the key switches. Let us learn how to clean Mechanical keyboard switches.
Cleaning the mechanical keyboard will involve a host of basic requirements. You can check out the options for the best cleaning efficiency so that you can continue getting access to the best possible experience with your keyboard for a prolonged period of time.
Contents
What Are the Mechanical Keyboard Switches?
Each of the keys on a mechanical keyboard has a switch and this switch plays a major role to let the system know which key has been pressed. In sharp contrast to the laptop keyboards that use a thin pressure pad or the USB keyboards that use poppers, the mechanical switches on the mechanical keyboards do offer you a high degree of durability and capability.
When you press a switch, the switch is activated and a signal is sent to the PC to inform that it has been pressed. The flipping of the switch plays a major role in activating the PC and thus lets the keypress getting activated. This switch is what produces the click-clack noise and that is one of the prime reasons that makes the mechanical keyboard a little noisy.
Why is Cleaning Mechanical Switches Much Important?
Mechanical key switches are known to be more resilient than most of alternative keyboards. The key switches are designed to last a lifetime and are never designed to wear away any time soon. However, one major cause that can make the mechanical key switches fail is that they can collect grime and dust.
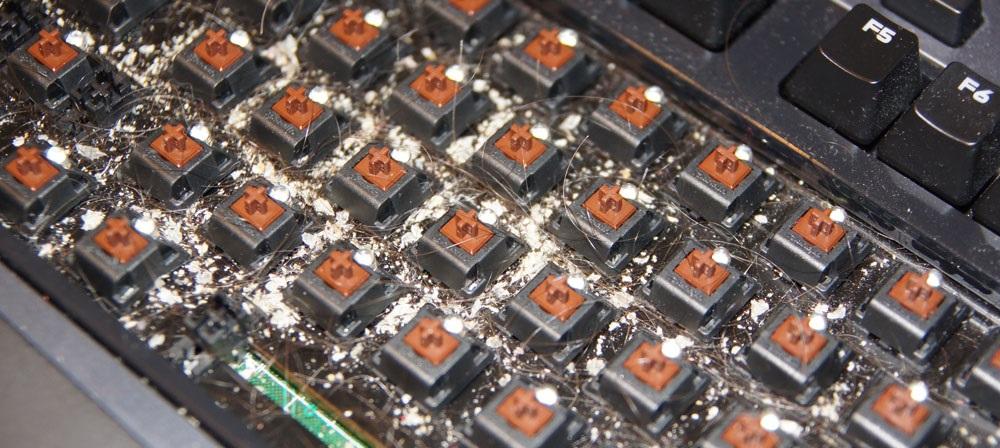
Of course, grime and dust will not make your key switches break or get damaged. But, they can get the keys jammed and make them less responsive. The mechanical keyboards are designed to be responsive and comfortable to type in. That is exactly why it is quite essential to clean your key switches thoroughly. It would also be important to ensure that you have cleaned your keyboard and key switches thoroughly to ensure that it is hygienic to keep the keys and key switches cleaner to the core. When you spill drinks or anything else on the keyboard, cleaning it off completely can prove to be quite impressive. A dirty keyboard can cause a rash and itching that should cause you to use Dermele and similar creams.
How to Clean Mechanical Keyboard Switches?
When cleaning a mechanical key switch, it is much essential to ensure that you are exercising enough caution. You would definitely avoid any mistakes when cleaning the keyboard and key switches to avoid any concern. You need to follow the steps carefully to ensure that you are not damaging the keyboard in any way. The steps here should work as one of the best options in understanding how to clean a mechanical keyboard without removing the keys.
Here are the steps involved in how to clan the mechanical key switches:
Step 1: Remove the Keycaps
The first step in cleaning the mechanical key switches will be to remove the keycaps. Removing the keycaps can be quite easy and simple to go with. Removing the keycaps can be quite easy – as easy as simply popping it up.
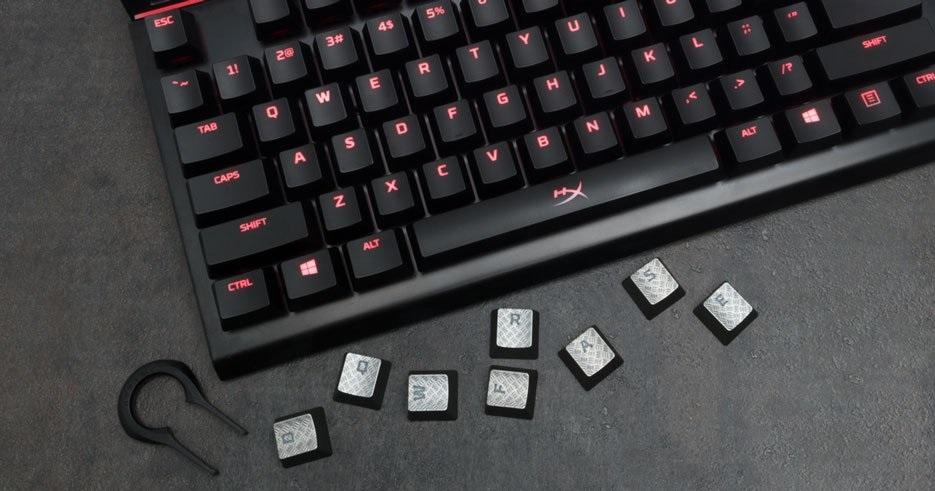
Before you remove the keycaps, make sure that you have taken an image of the keyboard. You would not want to mess up the layout of the keys. The image or photograph should be helpful in rearranging the key switches without issues. Store the keycaps in a bowl.
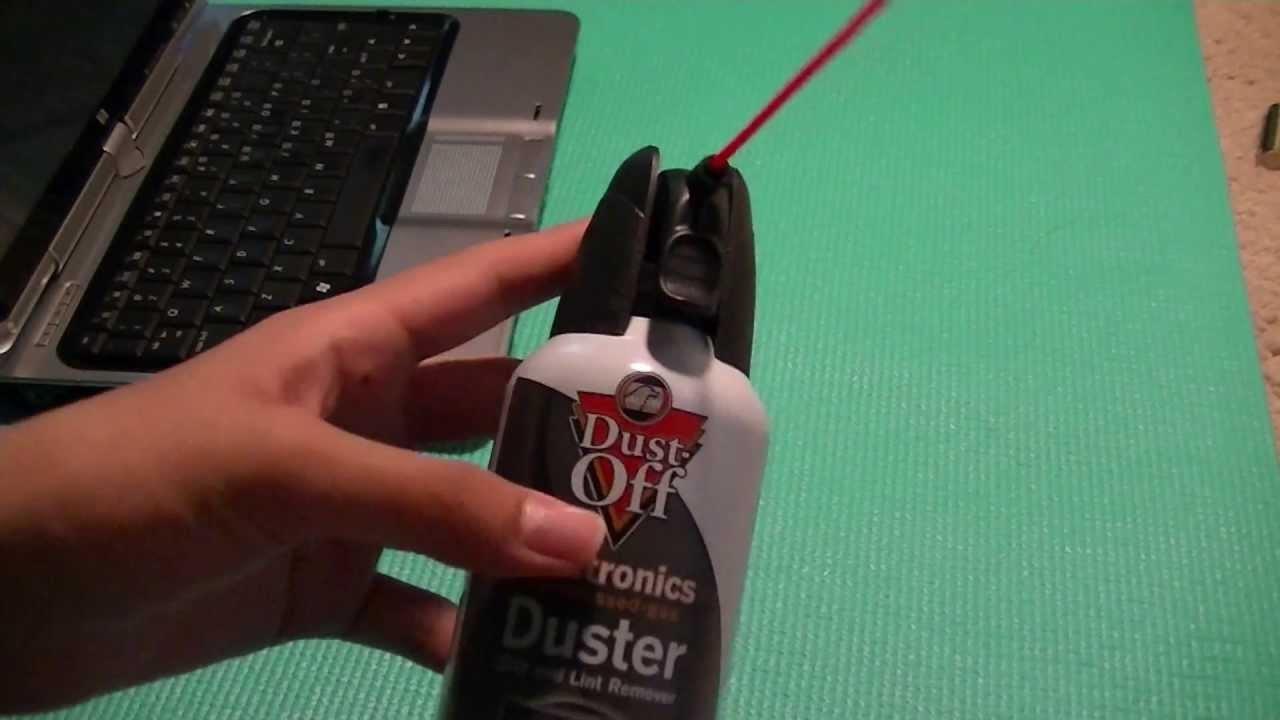
Step 2: Use Compressed air to clean switches
Once the keycaps have been removed, you should get access to the key switches underneath the keycaps. Spray the compressed air in all the creeks and crevices. You can spray up and down along the rows of keys. Spraying at every angle can help you achieve the best results. Make sure that the nozzle is not close enough to the key switch, else you may end up damaging the switch. You can even remove the pet hair or other debris from the keyboard.
Step 3: Use a nylon brush to clean the debris
Once you have cleaned the switches using compressed air, you can simply use a thin nylon brush for wiping away the tougher stains and gunk from the keyboard. It can be a great option for ensuring that the debris that was not cleaned by the compressed air is cleaned by the nylon brush. It can take a while to remove all the debris stuck inside the switches.
Step 4: Use a damp cloth with a cleaning solution
The next step would include cleaning the stubborn debris. You can use the premixed alcohol and water solution for dampening a new cloth. Rub the cloth up and down using every part of the keyboard. Make sure that you are not putting too much of the alcohol that is likely to erode the paint or plastic.
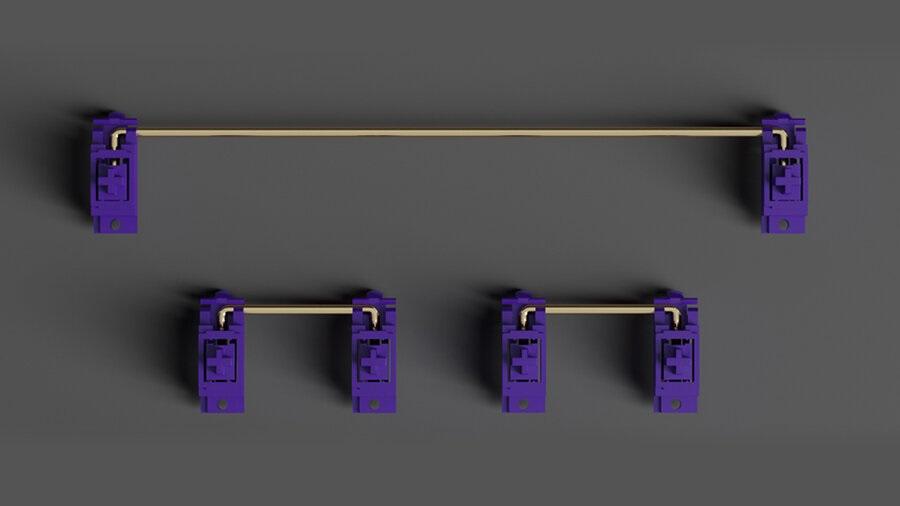
Step 5: Clean the Stabilizers
The stabilizers are used for holding the key switches and keys in place. The stabilizers are likely to get jammed up or get less responsive due to the grime and dust deposits. You are expected to keep it clean and ensure that they are extremely clean and free from every kind of debris.
Step 6: Let the Components Dry
Let the components of the keyboards such as switches and stabilizers dry up completely. You can keep the components exposed to air. It should ideally take around an hour for getting everything cleaned up. Once everything has dried up, ensure that nothing is left out by wiping it off using a dry and soft cloth. If it is damp, you need to ensure that it is quite clean.
Step 7: Reinstall the Keycaps
Now that everything is cleaned up, the next step will be to reinstall the keycaps back into place. You can use the image you previously had taken to insert the keycaps without any confusion or error.
The video here should be quite helpful in arriving at the easy options to clean your keyboard:
How to Clean Sticky Mechanical Keyboard Switches?
Did you spill liquid on your keyboard and found it has gone sticky? Wondering how to clean sticky mechanical keyboard switches? Cleaning it with Purell and Sanitisers can be a great option in many cases.
A few tips that can be helpful in cleaning sticky mechanical keyboard switches can include:
- Shake the keyboard thoroughly. Make sure that you do it carefully without damaging the keyboard.
- Use canned air for cleaning up the switch and debris around it.
- Remove the keycaps and clean up the switch
- You can use either the compressed air or cleaning solution to clean up the switch
- Replace the keycaps and you have done it!
If the fixes above do not solve the issue in your case, you can simply opt for changing or replacing the switch altogether.
How to Clean PBT Keycaps?
The PBT keycaps offer you an excellent functionality. However, they are quite expensive. That is exactly why you would want to focus on a proper cleaning of the keyboard. You do not want to damage the lettering and legend.
Some experts suggest using the denture cleaning powder for cleaning up the PBT keycaps. Yet another good combination for cleaning the PBT keycaps can include rubbing alcohol and a cotton ball. You can simply remove the keycaps using a keycap puller and put all the keycaps in a bowl. Once that done, you can clean up the keycaps with denture cleaner powder or rubbing alcohol depending upon your personal choice for the best cleaning solution.
How to Clean ABS Keycaps?
ABS Keycaps tend to introduce something referred to as Key shine. While cleaning the ABS keycaps can be one of the excellent options for ensuring the best cleaning performance, avoiding the key shine can be one of the excellent options that can ensure an efficient performance.
You can simply use the 92 percent of Isopropyl alcohol or rubbing alcohol for cleaning up the keycaps effectively and efficiently. You can dip the Q tip inside the solution and use it for cleaning the top of the keycaps. In fact, you can even take the keycaps off and wash them off in a soap and water solution. You can even use the dish soap that is mild enough for cleaning up the keycaps.
If you are wondering whether you can prolong the life of the keycaps and avoid the occurrence of the key shine, there is not much you will be able to do in this context. If you want to avoid the key shine more effectively, you need to use the PBT keycaps.
How to Clean a Mechanical Keyboard?
High-end mechanical keyboards can last over decades. In fact, your mechanical keyboard comes with high-end protection that should work efficiently without the need for taking much care. However, the dust and grime can cause severe issues with your keyboard. That is exactly why you need to focus on cleaning the keyboard more efficiently or effectively.
There are several ways you can clean your mechanical keyboard – one of them is preventive cleaning, while the other option is to use Deferred Cleaning.
Preventive Cleaning
This is a part of the regular cleaning performance. That way, you will prevent the accumulation of grime and dirt.
- Use a vacuum to remove the dirt and dust.
- Actuate each of the keys when cleaning up the keys
- Wipe the entire keyboard using a soft and lint-free cloth.
- Dry it with another cloth
You can follow these preventive methods for cleaning the keyboard frequently. When opting for the vacuum cleaners for the keyboards, do ensure that the choice of the vacuum cleaners is taken care of with an extreme care. You would want to pick the vacuum cleaner specifically designed for the purpose.
Deferred Cleaning
The Deferred Cleaning refers to the cleaning undertaken at not so frequent intervals. You can follow the instructions here below to opt for deferred cleaning of your keyboard.
Here are the steps you need to follow when opting for the deferred cleaning:
- Use a keycap puller to remove the keycaps one by one. Make sure you have taken the image of the keyboard before removing the keycaps. This will be helpful in reinstalling the keycaps.
- Clean the keycaps with the dish soap and denture cleaning powder.
- Vacuum the entire keyboard and its plate. You can use a handheld roller less cleaner for this purpose.
- If you find any spot on the keyboard that is filled with stubborn gunk, you can use a Q Tip dipped inside the rubbing solution to clean up the dirt and grime.
- Let the keyboard and the keycaps dry. While the dry, keep the keyboard upside down so that there will be no dust build-up of any nature.
- Replace the keycaps.
- Wipe the entire keyboard with a slightly damp microfiber cloth.
How to Clean a Laptop Keyboard?
Cleaning your keyboard in a germ-free manner can be helpful in letting you convert your keyboard into a brand new look. There are a few key parameters that can be helpful in achieving the best results in how to clean a laptop keyboard such as Surface.
The right way you can opt for in how to clean a laptop keyboard can include –
Step 1: Turn it off
Before you begin working on the keyboard, make sure that you turn off your laptop. That way, you would reduce the risk of short circuits due to moisture or any other issues. Also, make sure you are getting everything backed up.
Step 2: Remove the crumbs and other debris
Turn the laptop upside down and allow the crumbs to fall out. You can use the cleaning slime for removing the debris from the crevices and other areas. If this does not solve the issue, you can consider giving it a vacuum. You can use a small attachment and the lowest possible power setting. It may be a good idea to go with the handheld vacuum for this purpose. You can even use a compressed air for the purpose of cleaning your laptop keyboard.
Step 3: Clean the keyboard surface
Cleaning the surface of the keyboard from the things such a germs, grime, smudges and stains can prove to be one of the best options to help you achieve the best possible standards. You can use the disinfectant for cleaning up the surface of the keyboard. Wipe the keycaps one by one. Make sure you do not spray water or any other liquid for cleaning the keyboard.
How to Remove Mechanical Keyboard Keys?
Removing mechanical keyboard keys is quite simple and easy if you have the right tools with you. You would want to remove the keycaps or keys when you are looking to replace the damaged keys, keycaps, or even key switches.
Removing the mechanical keyboard keys can be an easy task and you should be able to do this by following the steps here below:
- Attach the keycap puller to the key you want to remove.
- Pull up the keycap to remove it away from the key switch
- Remove the keycap from the keycap puller
That does it. It is so simple to remove the keycaps from the keyboard and clean them up.
The Concluding Thoughts
Well, cleaning a mechanical keyboard and the mechanical switches assume a lot of importance and essence. We do understand that the tips shared here should ideally help you arrive at the best options in how to clean up the keyboard or the key switches.