Did you know that according to Statista, in the first half of the last year, 236.1 million ransomware cases occurred globally? Quite frightening when it comes to numbers, isn’t it?
To protect yourself, and your hard-working WordPress websites you must consider different methods of protection. From invading bots’ protection to cloud protection, you can secure your sites in many ways.
Hence, let’s explore the most common one – how to blacklist suspicious IP addresses.
But first, let’s dive in a little bit more about why it is important to blacklist suspicious IPs.
Why Blacklist Suspicious IP Addresses?

Blacklisting questionable Internet Protocol (IP) addresses is a powerful strategy for protecting your website from malicious assaults.
Imagine it as creating a digital fence to keep the bad people out. You can shield your website and your users from possible harm by blocking traffic from known troublemakers.
So let’s get down to business and discover how to blacklist those suspect IPs like an expert.
How to Blacklist Suspicious IP Addresses?
The best way to protect your WordPress site is to use a trustworthy plugin as your right hand. Remember, we are trying to prevent the bad guys from hijacking your site. And what better plugin to use than WP Login Lockdown?
WP Login Lockdown
WP Login Lockdown is a powerful plugin to have in your arsenal, as it offers plenty of features you can use to ward off different types of attacks. It is simple to set up, with a pleasant user-oriented design.
As mentioned before, with it you can blacklist troublesome IP addresses or whitelist the ones you deem safe, and here is how you can do it in no time.
Blacklisting IPs With WP Login Lockdown
You thought there was going to be just one way, weren’t you? Actually, there are two ways you can blacklist IPs with WP Login Lockdown.
Cloud Protection
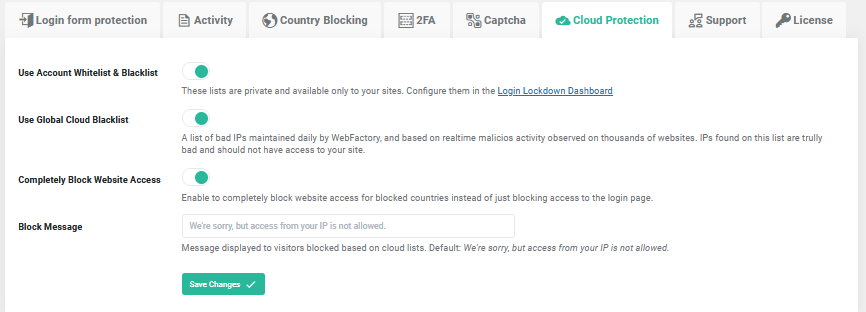
If you are a proud owner of multiple websites, you’ll be glad to read that you can blacklist IP addresses from one place. That’s right, you can set up one global list in the Dashboard that you can rapidly distribute to each website you control rather than creating a list for each site you work on.
You just need to enter the IP address once, and every website pulls it from the created list. This is a nifty feature to have if you own an agency that handles dozens or more websites.
Going to the “Cloud Protection” tab in your WordPress plugin settings will activate that option for you, as shown in the image below.
Blacklisting by Country
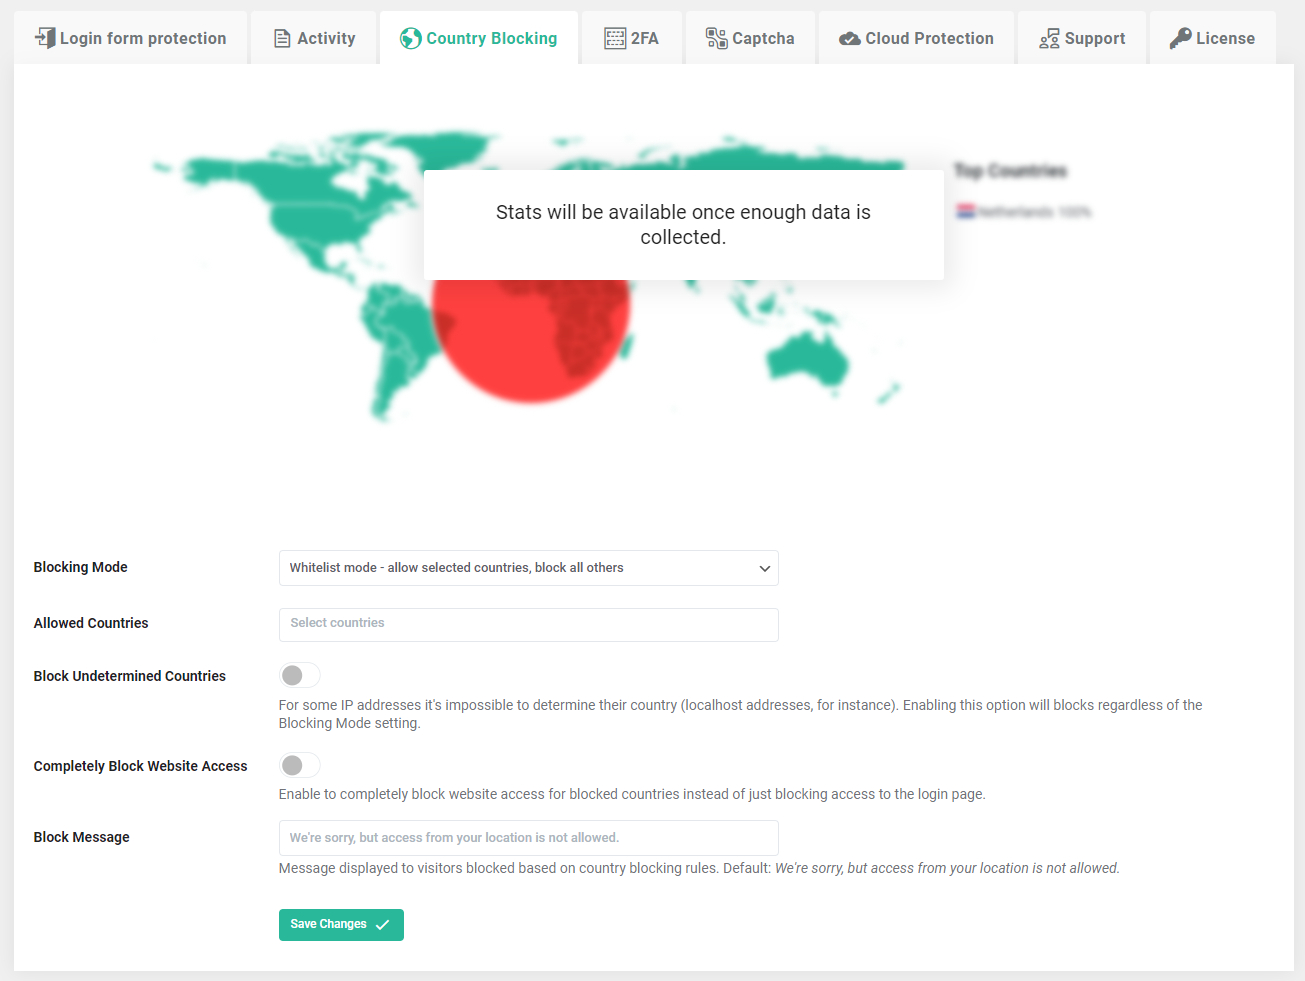
Another feature you can use with WP Login Lockdown is the Country Blocking feature. With it, you block or allow IP addresses from specific countries with ease.
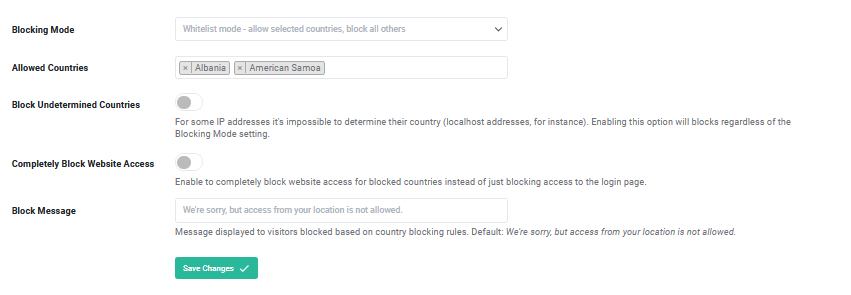
All you need to do is to select the blocked countries (or the approved ones if you are in whitelist mode), decide if you want to block visitors with unknown locations, choose if you want to grant those users access to the site or only prevent the login page, disable or enable blocking, and input a message that will be displayed when blocking users.
To Sum Up
In conclusion, it’s time to move and blacklist those suspect IP addresses if you don’t want your WordPress site to be the next target of a ransomware attack. What better method for doing this than with WP Login Lockdown’s assistance?
This plugin acts as a doorman for your website, guaranteeing that only good people enter by utilizing features like cloud security and country blocking. So let’s make life difficult for the bad IPs and keep them away from your favorite websites!


