Vietnam is full of color, scooters, noodles, beaches, and busy cities. It is also full of moments when you need the internet right now. You may need a map in Hanoi. You may want to book a ride in Da Nang. You may want to send a sunset photo from Phu Quoc. A Vietnam eSIM makes all of this easy.
TLDR: A Vietnam eSIM lets you get mobile data without buying a plastic SIM card. You buy it online, scan a QR code, and activate it on your phone. It is best to install it before your trip, then turn it on when you arrive. Check that your phone supports eSIM and is unlocked before you buy.
What is a Vietnam eSIM?
An eSIM is a digital SIM card. It is built into your phone. You do not need to open the SIM tray. You do not need to hunt for a store after a long flight. You do not need to touch a tiny plastic chip and hope it does not fall under your hotel bed.
A Vietnam eSIM gives you mobile data in Vietnam. Some plans also include calls and texts. But many travel eSIMs are data only. That is still great. You can use apps like WhatsApp, Messenger, Google Maps, Grab, Zalo, and Instagram.
Think of it like this. A normal SIM is like a paper ticket. An eSIM is like an online ticket. Same idea. Less fuss.
Why use an eSIM in Vietnam?
Vietnam is easy to travel. But the internet makes it much easier. With an eSIM, you can land, switch on data, and start exploring.
- No airport stress. Skip the SIM card counter lines.
- No plastic card. Nothing to lose.
- Fast setup. Scan a QR code and go.
- Easy top ups. Many providers let you buy more data online.
- Keep your main number. Your home SIM can stay active for calls or messages.
- Great for short trips. Buy only what you need.
It is also handy if you visit more than one place. You can buy a Vietnam-only eSIM or a regional Asia eSIM. If your trip includes Thailand, Cambodia, or Singapore, a regional plan may be useful.
Step 1: Check if your phone supports eSIM
Before you buy anything, check your phone. Not every phone supports eSIM. Most newer iPhones do. Many newer Samsung, Google Pixel, and other Android phones do too.
Here is the simple test:
- Open your phone settings.
- Look for Mobile Data, Cellular, or SIM Manager.
- Search for an option like Add eSIM or Add Mobile Plan.
If you see that option, good news. Your phone likely supports eSIM.
You should also check if your phone is unlocked. An unlocked phone can use plans from other carriers. A locked phone may only work with your home carrier. If you are not sure, ask your carrier before your trip.
Step 2: Choose the right Vietnam eSIM plan
Now comes the fun part. Pick your plan. Do not worry. It is not like choosing a life partner. It is more like choosing a bowl of pho. You just need the right size.
Look at these things:
- Data amount: Common plans include 1 GB, 3 GB, 5 GB, 10 GB, 20 GB, or unlimited data.
- Validity: Plans may last 7 days, 15 days, 30 days, or longer.
- Network: Check which local Vietnam network the eSIM uses.
- Hotspot: Some plans allow sharing data with your laptop or friend.
- Calls and texts: Most travel eSIMs focus on data only.
- Speed rules: Some “unlimited” plans slow down after heavy use.
If you use maps, chat, and light social media, 3 GB to 5 GB may be enough for a week. If you upload videos, join video calls, or scroll like a champion, pick 10 GB or more. If your phone is basically glued to your hand, consider unlimited data.
Step 3: Buy the eSIM online
You can buy a Vietnam eSIM from an online eSIM provider. The process is usually simple. Choose Vietnam. Pick a plan. Pay by card, PayPal, Apple Pay, or another method. Then the provider sends you setup details.
You will usually get one of these:
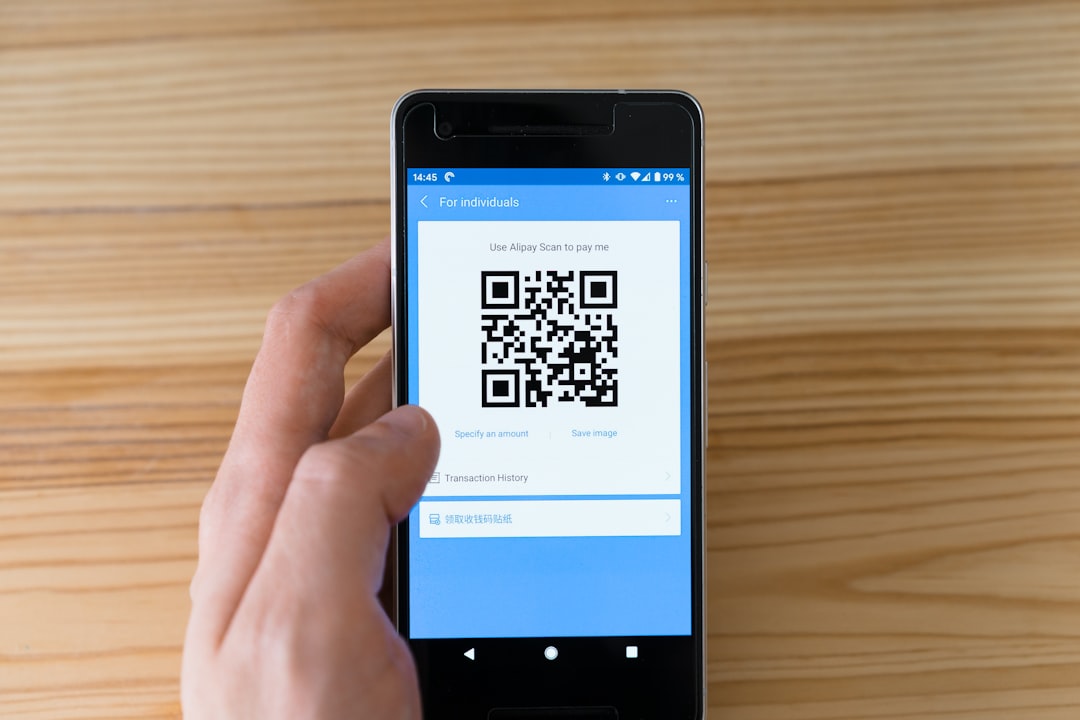
- A QR code.
- A manual activation code.
- An app-based install button.
The QR code is the most common method. It is also the easiest. It feels a bit magical. Your phone looks at a square pattern and suddenly knows how to connect in Vietnam. Very fancy. Very 2026.
Step 4: Install your Vietnam eSIM before you fly
Install the eSIM while you still have stable Wi-Fi. Your home Wi-Fi is perfect. Your office Wi-Fi is fine. Airport Wi-Fi can work, but it may be moody. Hotel Wi-Fi can be a mystery box.
Here is the basic idea:
- Open the eSIM email or app.
- Find the QR code.
- Go to your phone settings.
- Choose Add eSIM or Add Mobile Plan.
- Scan the QR code.
- Follow the steps on your screen.
- Name the plan Vietnam so you do not get confused.
Do not delete the eSIM after installing it. Many eSIMs can be installed only once. If you delete it, you may need support from the provider. That is not fun at midnight with jet lag.
Step 5: Activate it at the right time
This part matters. Some eSIM plans start counting from the moment you install them. Others start when they connect to a network in Vietnam. Read the instructions from your provider.
If the plan starts after installation, wait until close to your travel date. If it starts when it connects in Vietnam, you can install it early and relax.
When your plane lands in Vietnam, do this:
- Turn off Airplane Mode.
- Go to mobile settings.
- Turn on your Vietnam eSIM.
- Set it as your mobile data line.
- Turn on Data Roaming for the eSIM if required.
- Wait a minute or two.
Then open a map or browser. If it loads, you are ready. Welcome to Vietnam. Go find coffee.
iPhone setup in simple words
On an iPhone, the path is usually easy.
- Open Settings.
- Tap Cellular or Mobile Data.
- Tap Add eSIM.
- Scan the QR code.
- Follow the prompts.
- Label the line as Vietnam.
- Choose it for mobile data when you arrive.
You can keep your main SIM for calls and texts. You can use the Vietnam eSIM for data. This is useful for bank codes or family messages. But be careful with roaming costs on your home SIM. Turn off data roaming on your home line if you do not want surprise charges.
Android setup in simple words
Android menus can look different. Samsung, Pixel, and other brands use slightly different names. But the idea is similar.
- Open Settings.
- Tap Connections, Network, or SIM Manager.
- Tap Add eSIM or Add Mobile Plan.
- Scan the QR code.
- Follow the steps.
- Name the eSIM Vietnam.
- Set it as the data SIM in Vietnam.
If it does not connect right away, restart your phone. Yes, the classic trick still works. It is boring. It is powerful.
How much data do you need in Vietnam?
This depends on your habits. Be honest with yourself. Are you a light user? Or are you the person who watches travel vlogs while already traveling?
- 1 GB to 3 GB: Good for maps, messages, and light browsing.
- 5 GB: Good for a short trip with social media.
- 10 GB: Good for one to two weeks of normal use.
- 20 GB or more: Good for heavy users and remote workers.
- Unlimited: Good if you do not want to think about data.
Use hotel Wi-Fi for big downloads. Save videos before you travel. Turn off automatic app updates. Your data will last longer. Your wallet will smile.
Common problems and quick fixes
Most eSIM setups are smooth. But travel loves surprises. Here are easy fixes.
- No signal? Turn Airplane Mode on and off.
- Still no data? Restart your phone.
- Wrong SIM is using data? Set the Vietnam eSIM as your data line.
- Internet still not working? Turn on data roaming for the eSIM.
- Slow speed? Move outside or try another area.
- QR code not scanning? Enter the details manually if provided.
Sometimes you may need to set an APN. This is a small network setting. Your provider should give it to you if needed. Copy it carefully. One wrong letter can ruin the party.
Image not found in postmetaTips for using your eSIM like a pro
A few small habits can make your eSIM experience better.
- Install the eSIM before your flight.
- Save the QR code offline.
- Take a screenshot of the setup instructions.
- Label your SIM lines clearly.
- Keep your provider support chat or email handy.
- Use Wi-Fi for huge uploads.
- Check your data balance every few days.
Also, download offline maps for Vietnam before you leave. This helps if you enter a weak signal area. It also helps when your taxi driver takes a “creative” route.
Can you use apps like Grab, WhatsApp, and Google Maps?
Yes. A Vietnam eSIM with data works well for most travel apps. You can use Grab for rides and food delivery. You can use Google Maps for walking routes. You can use WhatsApp, Telegram, or Messenger to chat.
Some local services may ask for a phone number. If your eSIM is data only, it may not include a Vietnamese number. This is usually fine for basic travel. But if you need a local number, choose a plan that includes calls and texts, or buy a local SIM after arrival.
Is a Vietnam eSIM better than a physical SIM?
For many travelers, yes. It is faster and easier. You can set it up from home. You can avoid airport queues. You can keep your normal SIM in your phone.
But a physical SIM can still be useful. It may include a local number. It may be cheaper for long stays. It may offer more local call options.
So the best choice depends on your trip. For short holidays, business trips, and simple data needs, an eSIM is a great pick. For long stays or local paperwork, a physical SIM may be worth it.
Final thoughts
Getting and activating a Vietnam eSIM is not hard. Check your phone. Pick a plan. Buy it online. Install it on Wi-Fi. Turn it on when you land. That is the whole story.
With a good eSIM, Vietnam becomes easier to enjoy. You can find hidden cafes. You can translate menus. You can book rides. You can share photos. You can get lost on purpose and still find your way back.
So before you pack your sandals, charger, and sense of adventure, sort out your Vietnam eSIM. Future you will be happy. Especially when you step out of the airport, open your map, and head straight toward your first bowl of steaming pho.